ew scenarios can be added from the Features menu or from the user story
Add new scenarios from Features Menu
Step 1: Access the features menu.
Step 2: Select the Feature you would like to add the new Scenario to, by clicking on the Scenario title.
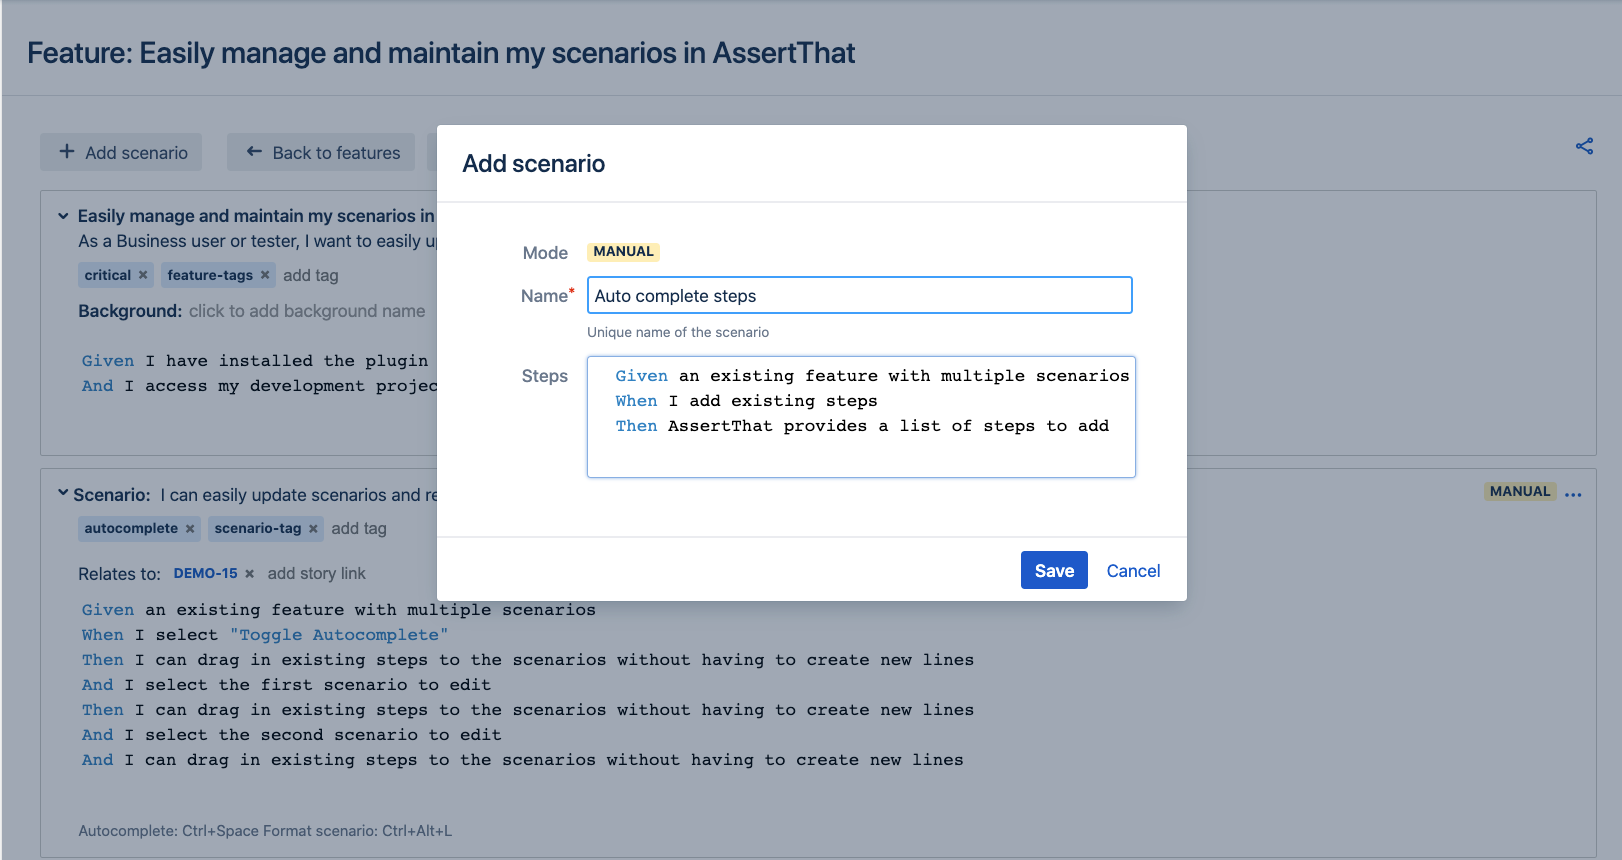
Step 3: Select the Add scenario button from the menu.
Step 4: Complete Scenario Name (mandatory). The scenario steps can be added now or at a later stage. The Mode is set to Manual or Automated. This setting is used by the plugin to determine if the scenario will be downloaded for Integration with Test Automation Frameworks. AssertThat - BDD & Cucumber for Jira supports Scenario Examples syntax.
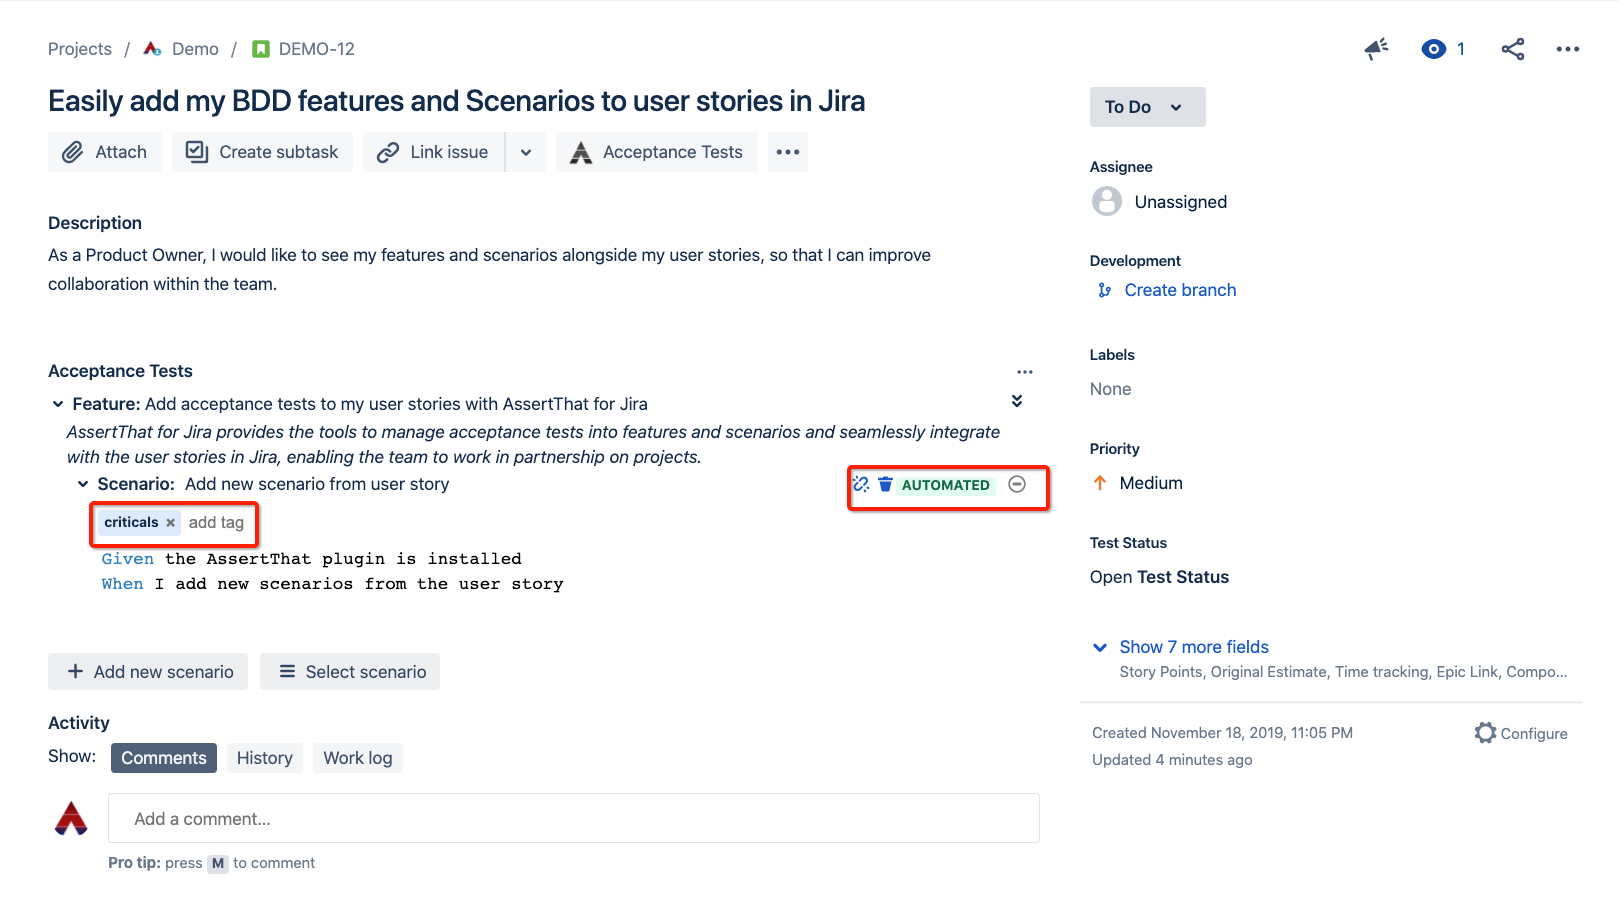
Step 5 - Enrich scenario with tags, and links to user stories.

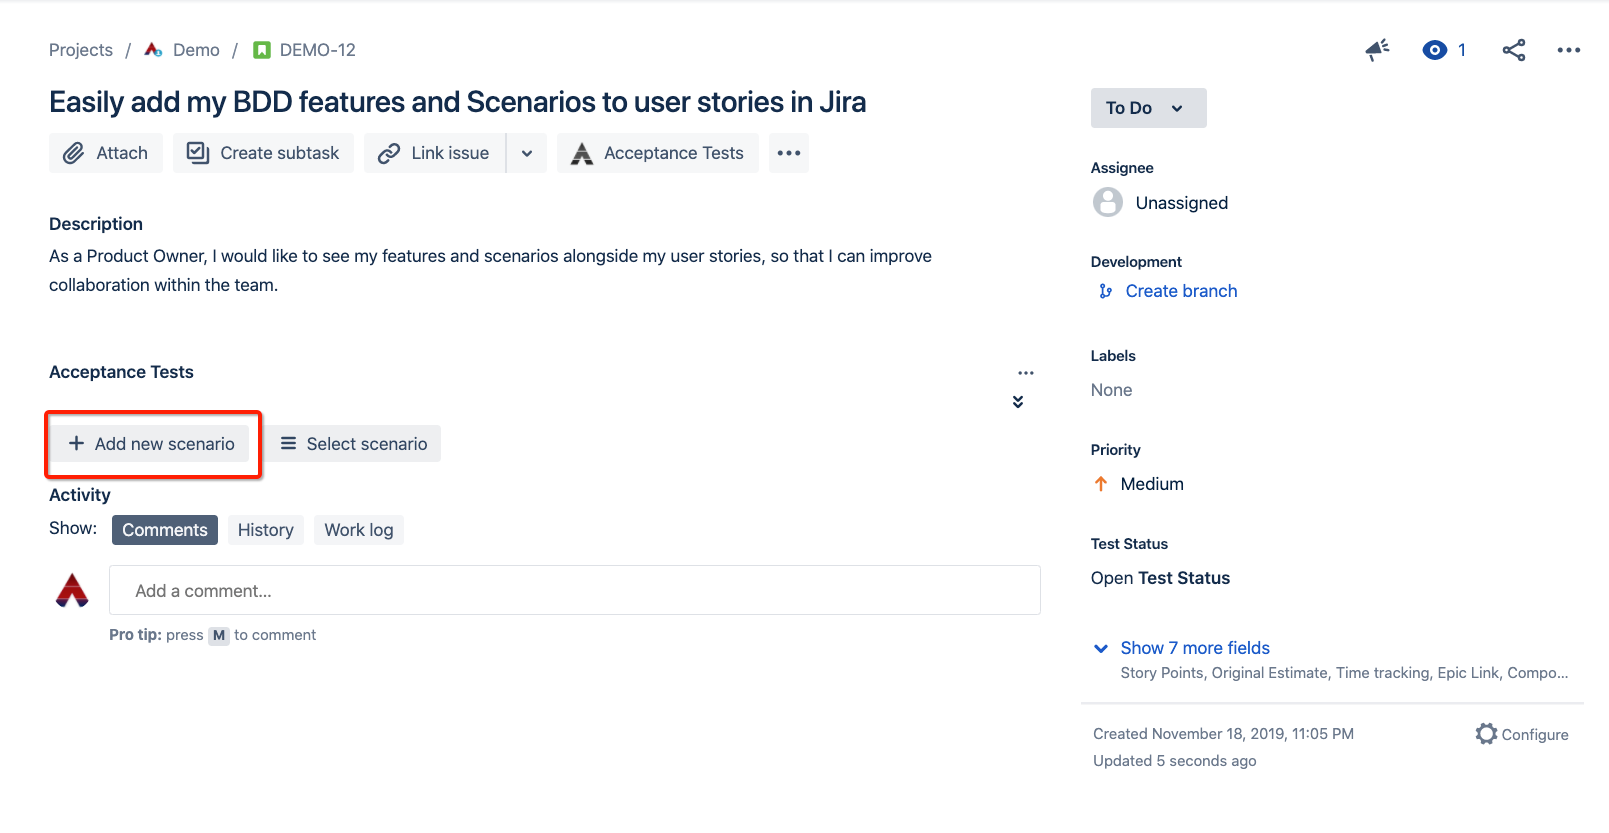
Add new scenario from user story
Step 1: When the AssertThat plugin is enabled new options will be available from within the issues screen. To add a new scenario from a user story, select the Add new scenario button.
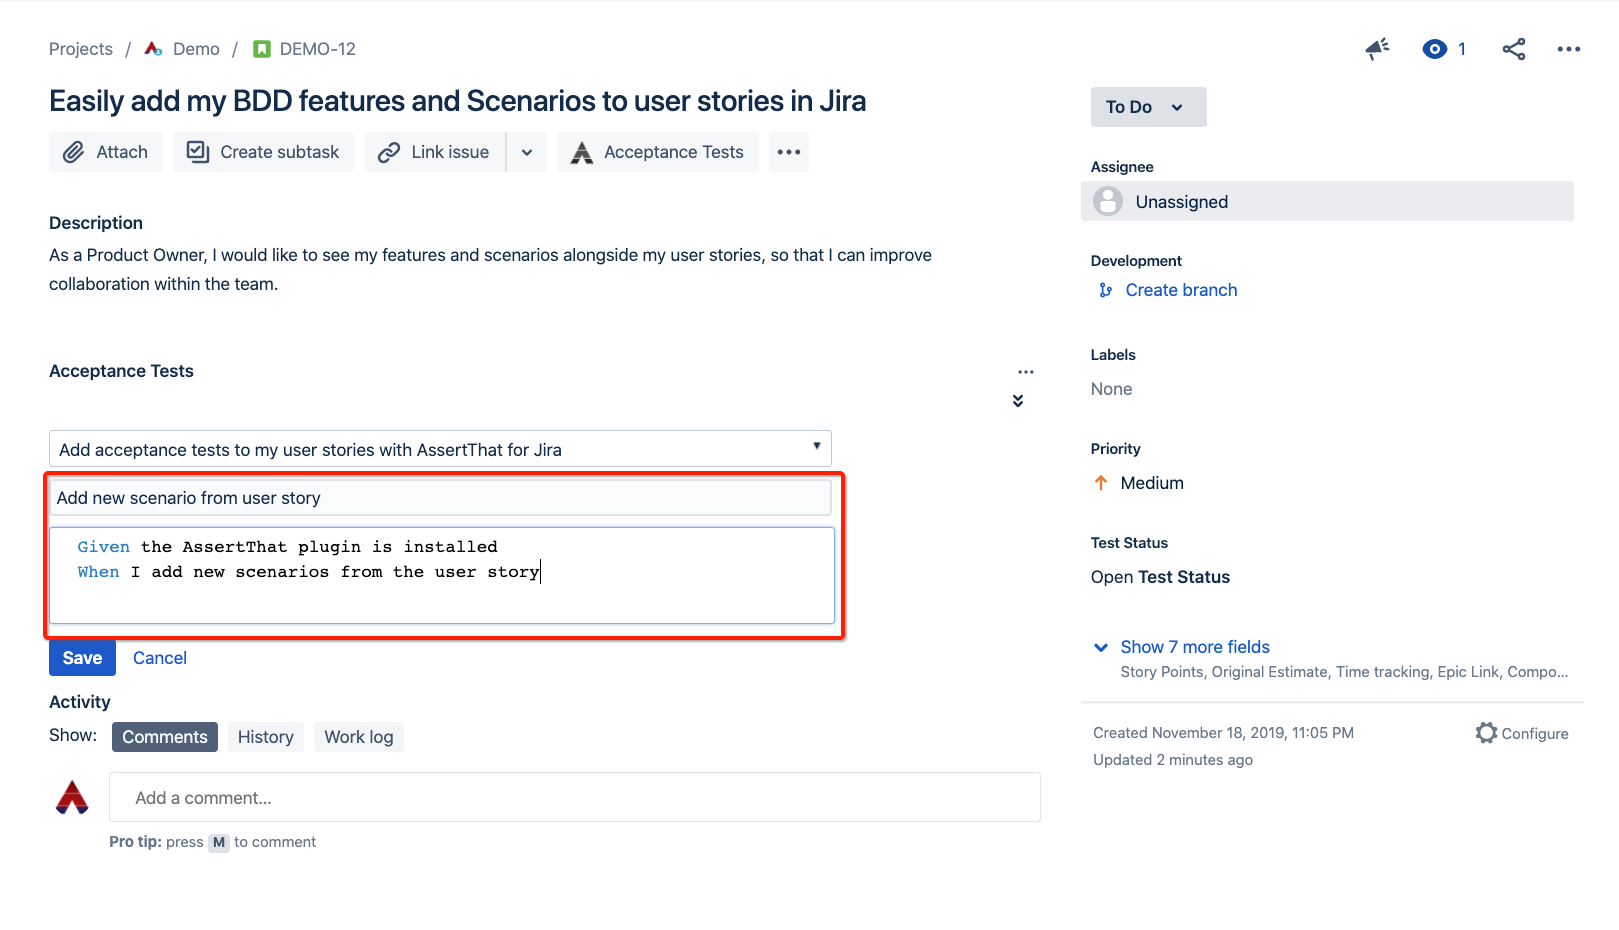
Step 2: Select the feature to add the new scenario to, and update the details for Scenario name and steps.
Step 3: Complete the Scenarios detail by adding tags and setting the scenario as automated or manual. This setting is used by the plugin to determine if the scenario will be downloaded for Integration with Test Automation Frameworks.